
Making My EC2 Visible: CloudWatch Logging with Terraform and IAM
From invisible to observable: IAM, CloudWatch Agent, and SSM wired together with Terraform
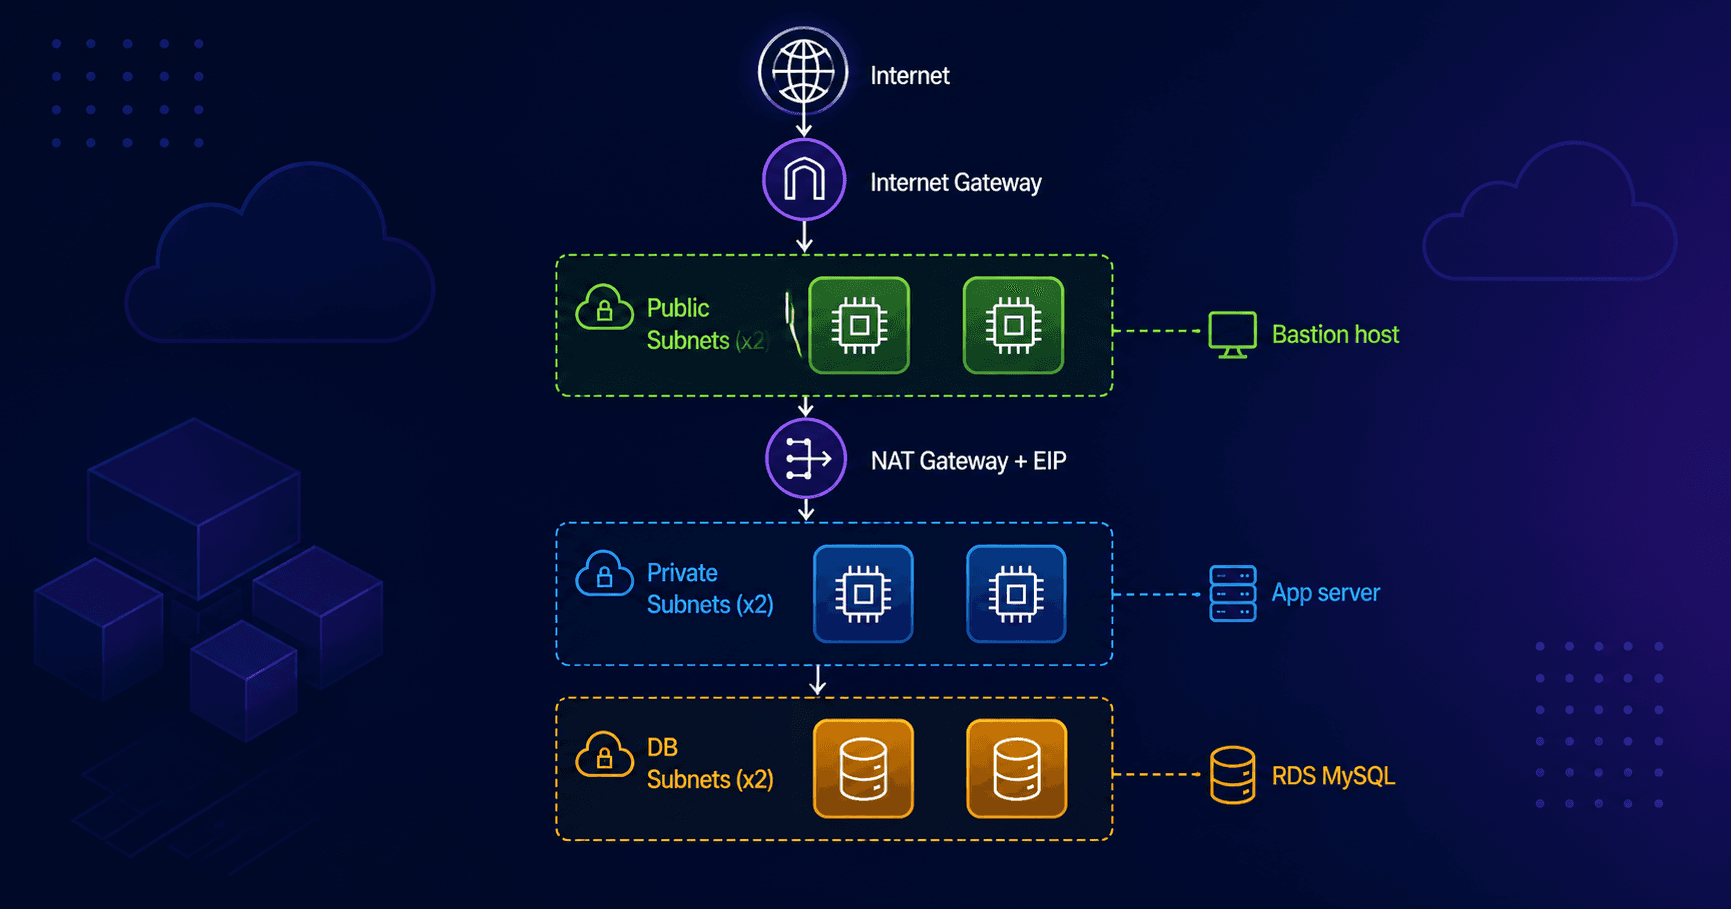
In my last post I built a three tier AWS architecture from scratch using Terraform. VPC, subnets, security groups, bastion host, app server, RDS. It worked. But after I SSHed in and confirmed everything was running, I realized I had a problem.
My bastion host was completely blind. If something went wrong, I had no logs. No visibility. I would have to SSH in and manually grep through /var/log/messages hoping to find something useful.
That is not how production systems work. So the next step was obvious: wire up CloudWatch logging.
Here is what I added and why each piece exists.
What You Need to Wire Together
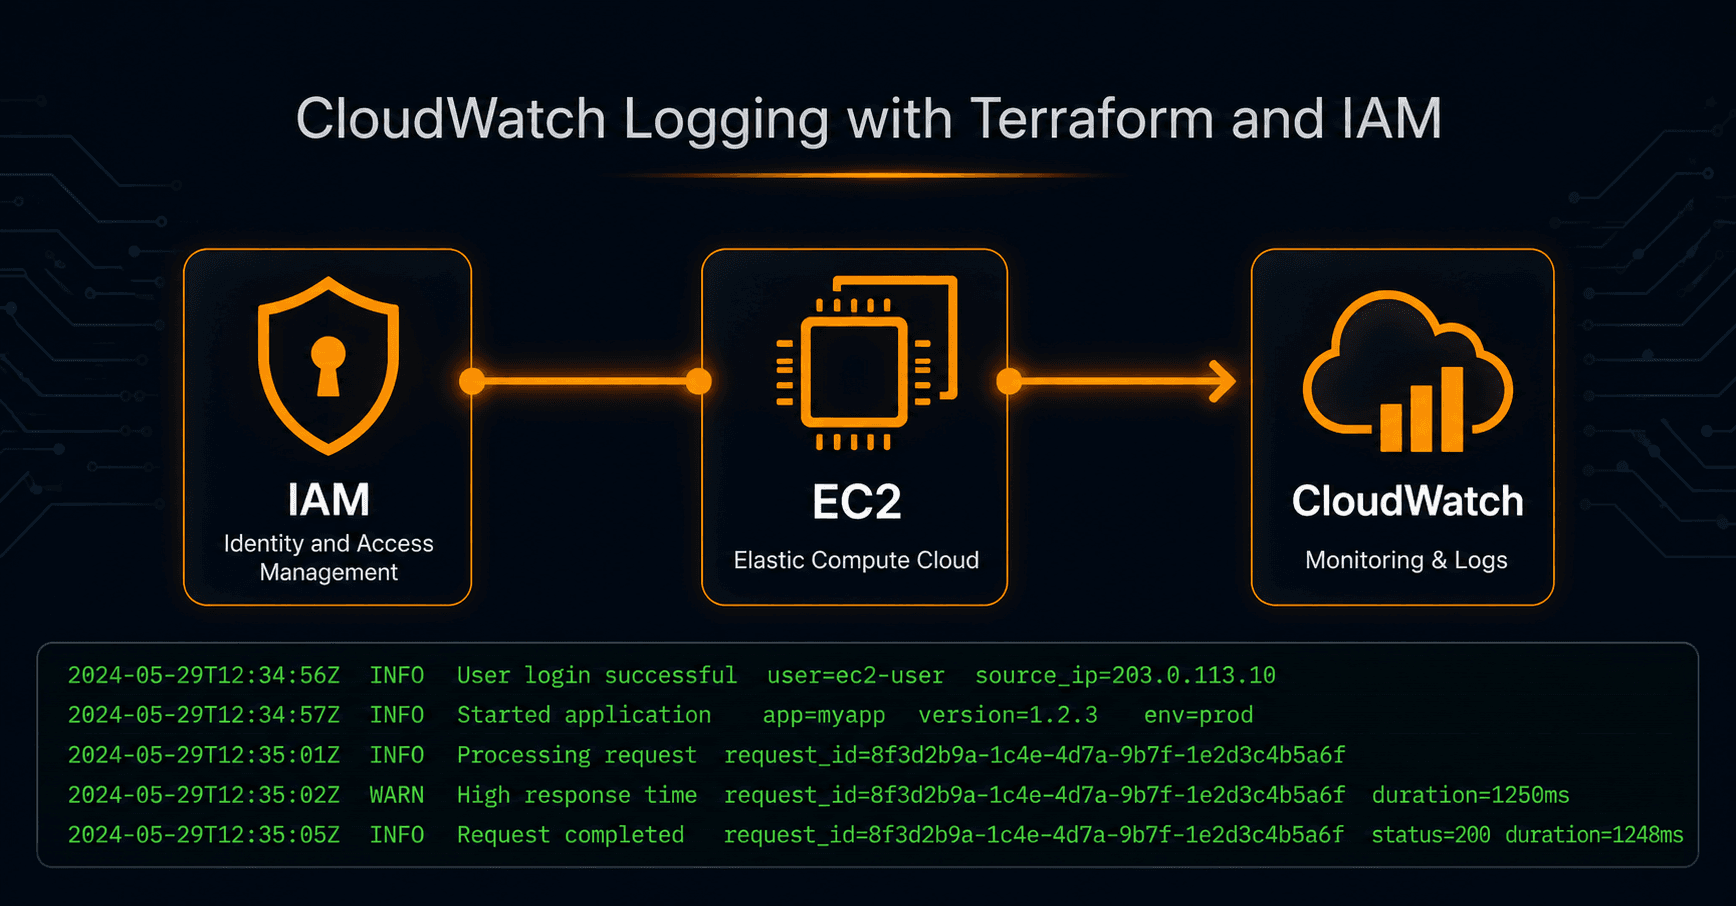
Getting CloudWatch logs flowing from EC2 requires three things working together:
IAM Role (permission to send logs)
    +
CloudWatch Agent (collects and ships logs)
    +
Agent Config (tells the agent what to collect)
Miss any one of these and nothing works. No error either, just silence.
Step 1: IAM Role and Instance Profile
The EC2 instance needs permission to write logs to CloudWatch. You give it that permission through an IAM role attached as an instance profile.
resource "aws_iam_role" "ec2_role" {
  name = "ec2-cloudwatch-role"

  assume_role_policy = jsonencode({
    Version = "2012-10-17"
    Statement = [
      {
        Action    = "sts:AssumeRole"
        Effect    = "Allow"
        Principal = {
          Service = "ec2.amazonaws.com"
        }
      }
    ]
  })

  tags = {
    Name = "ec2_role"
  }
}
The assume_role_policy is the trust policy. It answers the question: who is allowed to use this role? In this case, the answer is the EC2 service itself.
Next, attach the AWS managed policy that grants the CloudWatch agent the permissions it needs:
resource "aws_iam_role_policy_attachment" "cloudwatch_attach" {
  role       = aws_iam_role.ec2_role.name
  policy_arn = "arn:aws:iam::aws:policy/CloudWatchAgentServerPolicy"
}
CloudWatchAgentServerPolicy gives the agent permission to create log groups, create log streams, and put log events. You do not need to write a custom policy for this.
Then wrap the role in an instance profile. An instance profile is the container that lets an EC2 instance actually use an IAM role. The role itself is not enough:
resource "aws_iam_instance_profile" "ec2_instance_profile" {
  name = "ec2_instance_profile"
  role = aws_iam_role.ec2_role.name
}
Step 2: Attach the Instance Profile to the Bastion
In my three tier setup I added the instance profile to the bastion host only. The bastion is internet facing and the machine I actually SSH into. That is the one worth monitoring right now. The app server in the private subnet has nothing running on it yet.
The change to the bastion resource is two lines:
resource "aws_instance" "bastion_host" {
  ami                         = "ami-0278a2977150e13fc"
  instance_type               = "t3.micro"
  subnet_id                   = aws_subnet.main_subnet_public_1.id
  vpc_security_group_ids      = [aws_security_group.bastion_sg.id]
  key_name                    = aws_key_pair.bastion_key.key_name
  associate_public_ip_address = true
  iam_instance_profile        = aws_iam_instance_profile.ec2_instance_profile.name  # added
  user_data                   = local.cloudwatch_user_data                            # added

  tags = {
    Name = "bastion_host"
  }
}
Step 3: Install and Configure the CloudWatch Agent via user_data
user_data is a script that runs once when the EC2 instance first boots. I used it to install the CloudWatch agent, write its config, and start it.
locals {
  cloudwatch_user_data = <<-EOF
    #!/bin/bash

    yum update -y
    yum install -y amazon-cloudwatch-agent

    cat <<CONFIG > /opt/aws/amazon-cloudwatch-agent/etc/amazon-cloudwatch-agent.json
    {
      "logs": {
        "logs_collected": {
          "files": {
            "collect_list": [
              {
                "file_path": "/var/log/messages",
                "log_group_name": "ec2-logs",
                "log_stream_name": "{instance_id}"
              }
            ]
          }
        }
      }
    }
    CONFIG

    /opt/aws/amazon-cloudwatch-agent/bin/amazon-cloudwatch-agent-ctl \
      -a fetch-config -m ec2 \
      -c file:/opt/aws/amazon-cloudwatch-agent/etc/amazon-cloudwatch-agent.json \
      -s
  EOF
}
Breaking down what this does:
Install the agent. amazon-cloudwatch-agent is in the Amazon Linux repos. One yum command.
Write the config. The JSON config tells the agent what to collect. In this case /var/log/messages, send it to a log group called ec2-logs, and use the EC2 instance ID as the stream name so you can tell instances apart if you have more than one.
Start the agent. The amazon-cloudwatch-agent-ctl command fetches the config and starts the agent as a service. The -s flag means start immediately.
I used a locals block to keep the user_data script out of the resource block. It keeps things readable.
Step 4: Verify It Is Working
After terraform apply, wait a few minutes for the instance to boot and the agent to start. Then go to CloudWatch in the AWS console, navigate to Log Groups, and look for ec2-logs.
If you see a log stream named after your instance ID with entries from /var/log/messages, everything is wired up correctly.
You can also SSH into the bastion and check the agent status directly:
sudo /opt/aws/amazon-cloudwatch-agent/bin/amazon-cloudwatch-agent-ctl \
  -a status
A healthy response looks like:
{
  "status": "running",
  "starttime": "...",
  "version": "..."
}
Also, To confirm everything was working I ran a quick test. I SSHed into the bastion and appended a test message directly to the log file:
echo "TEST-CLOUDWATCH-123" | sudo tee -a /var/log/messages
Within a minute I could see TEST-CLOUDWATCH-123 appear in the CloudWatch log stream. That confirmed the whole chain was working, agent running, IAM permissions correct, logs flowing.

The Problem With This Approach
This works. But it has a flaw that I only understood after the fact.
The agent config is baked into user_data. That script runs once at boot. If I want to add a new log file to collect, or change the log group name, I have to destroy and recreate the EC2 instance to pick up the change.
That is not acceptable in a real environment. You do not want to terminate an instance just to change a logging config.
The Better Way: Store Config in SSM Parameter Store
The fix is to store the agent config in SSM Parameter Store and have the agent fetch it from there instead of a local file.
First, store the config in SSM:
resource "aws_ssm_parameter" "cloudwatch_config" {
  name  = "/cloudwatch-agent/config"
  type  = "String"
  value = jsonencode({
    logs = {
      logs_collected = {
        files = {
          collect_list = [
            {
              file_path        = "/var/log/messages"
              log_group_name   = "ec2-logs"
              log_stream_name  = "{instance_id}"
            }
          ]
        }
      }
    }
  })
}
Then update the IAM role to allow SSM reads. Add a second policy attachment:
resource "aws_iam_role_policy_attachment" "ssm_attach" {
  role       = aws_iam_role.ec2_role.name
  policy_arn = "arn:aws:iam::aws:policy/AmazonSSMManagedInstanceCore"
}
Then update user_data to fetch from SSM instead of a local file:
locals {
  cloudwatch_user_data = <<-EOF
    #!/bin/bash

    yum update -y
    yum install -y amazon-cloudwatch-agent

    /opt/aws/amazon-cloudwatch-agent/bin/amazon-cloudwatch-agent-ctl \
      -a fetch-config -m ec2 \
      -c ssm:/cloudwatch-agent/config \
      -s
  EOF
}
Now if you want to change what logs you collect, you update the SSM parameter and restart the agent. No instance termination required.
sudo /opt/aws/amazon-cloudwatch-agent/bin/amazon-cloudwatch-agent-ctl \
  -a fetch-config -m ec2 \
  -c ssm:/cloudwatch-agent/config \
  -s
What I Learned
Three things stood out:
IAM roles and instance profiles are not the same thing. The role holds the permissions. The instance profile is the wrapper that lets EC2 actually assume the role. You need both.
user_data only runs once. If your config lives inside user_data, changing it means recreating the instance. For anything you might need to update later, SSM is the right place.
Visibility should not be optional. I built the three tier architecture and it worked, but I had no idea what was happening inside it. Adding CloudWatch took less than an hour. There is no reason to run EC2 instances without it.
What Is Next
The next step is enabling RDS IAM Authentication, replacing the hardcoded database password in my Terraform config with token-based access. I felt the pain of hardcoded credentials firsthand recently and there is a better way to handle it.